Difficult to get a focused shot with all the lights in the shop off but it was the only way to show the coolest feature on the boat. Courtesy ROPE LIGHTING!!!! Lighting was purchased from Imtra, they also provided the engine room lights, reading lights, and the overhead dome lights.


 Wouldn't it be great if I could just start talking about the boats at the beginning of these posts instead of writing something that is moderately interesting but totally unrelated to the projects that we are working on? So there no posts for a week.......we were sanding around the clock prepping the outside cockpit and inside the wheelhouse. I guess I could have taken a picture of a pile of dust or maybe a clean boat builder in the morning vs a powdered boat builder in the afternoon. Sanding can give a good idea of the actual size of a boat, this boat is huge (lots of corners and curves to hand sand). In the picture the wheelhouse has been primed out and the area around the windows has been painted. Today the rest of the wheelhouse was painted (not pictured). I think the color choice will work well with the teak, tough to show in a photo though. Once all the wheelhouse paint is completed the windows can be reinstalled and the headliner can go up.
 The truckload of teak has been milled up into usable pieces. Care was taken to minimize waste and we tried to estimate how much of each style of board we were going to need for this boat. Once everything is cut to fit and drilled out all the teak will need to be sanded and oiled. Then reinstalled and probably sanded and oiled again. Jeff and I have been working together this week getting the teak cut for the overhead. Two sets of hands on this type of job is a necessity, lots of "you drill this one while I cut this one" type stuff. We're making good progress and Jeff has been jumping up to help Dan Jr. with the painting.
 A more unimpressive photo you will not find. Thicker teak was cut to fit around the entire perimeter of the trunk top, then thinner 2" slats run athwart ship (new word just added to my vocab, spellcheck doesn't even know what it means). Teak circles are being milled out to mount the dome lights on. Head liner provided by Soundown will be glued to 1/8" plywood and held up by these pieces of teak. Fiddles and moldings are also being fit and drilled. It will be impressive when its finished but I won't be able to get far enough away with my camera to show you. Possible video 360??
 So I head out to the shop Saturday morning to begin this teak cutting madness and decide that it would be a good plan to put a new blade on the chop saw. Disassemble, old blade off, new blade on, reassemble, pull trigger, notice wobbly blade, realize that the chop saw's inner working are bent, price out a new saw online, decide on the saw that's right for the shop, drive to Lowe's, get the more expensive saw (that has the sliding feature) because its on sale and not "that much" more than the one I was going to get. Not much teak got cut on Saturday but the shop has a fancy new saw and for the sake of the saw I'm not letting anyone use it (other than myself) until all the teak has been cut.
 At nearly 30 dollars per board foot every scrap has been saved. Most of these small pieces can be cut into bungs or used as test pieces when fitting longer pieces. Anything left over will be sold as high end camp firewood for 65 dollars a box. I was thinking I could market it by saying that burning teak keeps away the mosquitoes. We could set up a stand at the end of the driveway with a coffee can for people to leave payment. "What that smell??" "Oh that's just my teak firewood, whenever I summer in Maine I only burn the best."
  The complex problems presented by the bow of the 38' Northern Bay could all be solved with this hatch. Original plans called for some round Freeman hatches (one on either side of the windlass) However, once the hatches arrived they looked too industrial to be installed on the bow of a pleasure boat. Plan B was to make a stainless framed hatch that would hinge outward to allow access to the anchor rope/chain in the rope locker. Plan B was abandoned for Plan C when I saw this hatch in the Hamilton Marine catalogue and thought it might be a fix all. We wouldn't have to build the hatch and it creates the same amount of usable space as the custom hatch that we now don't have to make.
 Two stainless steel Southco latches will hold the hatch down, and we were so impressed with these latches that we are going to use the same style on all the deck hatches (just a little bigger). As you can see the round hatch won't sacrifice much area over the triangular hatch that we now don't have to build. The word perfect is overused and seldom warranted but its a rare thing to stumble upon a product that just fits perfectly with the theme of a boat. This could be the greatest hatch that I've ever seen. Have I done an adequate job selling the idea of installing this hatch vs. building the hatch that we no longer have to build?
 Running lights have been installed on either side of the fly bridge. Hella LED lights were used because they are
 Hydraulic hoses have all been made and stationed (thesaurus claims that means the same thing as installed). To make the hoses measurements are taken and the hose is cut from the roll using a metal cutting chop saw. Ends are then pressed on using a hydraulic press that utilizes different sized dies to accommodate hose sizes from 1/4" to 1 1/4" inch. If we need larger hoses they need to made off site at Traction Heavy Duty Parts or Motion Industries.
  My idea of where the windlass switch and trim tab switch should go on the lower helm station. An upper control for the trim tabs have to go on the fly bridge and the secondary control for the windlass (wireless control) is already installed and working. If this location is acceptable then holes can be cut and more loose ends (wires) can be tied up.
 I was making hydraulic hoses, ordering lights, taking pictures, and running wire. To be clear everyone did more than the one thing I listed for them, the SHOP NEWS section is more of a summery of the days events than a detailed list of everything that everyone did.
 Writing a message on a piece of tape is by far the most effective way to keep people off a boat. The staging isn't strong enough to hang a chain and padlock. You can't write a message on a piece of rope. A pile of wood could be jumped over. No one messes with the tape, ever.
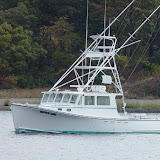
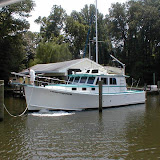
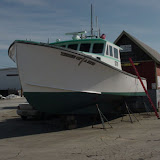
 On Native Son all the fiberglass work has been completed and Kendall has been gel coating as this project creeps to the finish line. John finished up the exhaust system and built the new radar stand (last picture). Dan patterned the windows (two weeks ago) and sent them to a Canadian company called Marinelite and we are waiting on a price quote for the windows. Looking back at the photos of this boat I have done a horrible job documenting this one. Moved the side decks, new wheelhouse, and new deck and most of it never was digitally recorded.
 The new radar stand installed. Two arms will be mounted to the cabin top to support the stand. Then the radar, antennas, and lights will have to be mounted and wires will have to be run.

 Front side of the 12 volt panel, 110 AC panel, and battery switches next to the back side of the 12 volt panel, 110 AC panel, and battery switches. Not finished and not as neat as it is going to be but I think you are starting to get the picture. This is much easier than it looks just cut the wire to length crimp an end on and connect. Do that 300 to 400 times and BOOM, completed electrical system. Things I fail to mention in my explanation: correct wire sizes, correct fuse sizes, maximizing limited space, back lit panels, shunts used to measure 12 volt amperage being used, 110 AC outlets getting power from an inverter or through an inverter (from a generator or shore power).
 The overhead in the forward cabin is set for head liner. Wherever the is plywood now there will be teak in the future. Gaps will be filled with wires for lights and a fan. Headliner will be glued to 1/8" plywood and will be installed in panels with all the seams hidden by 2" pieces of teak. While I'm talking about the forward cabin Jeff, Dan Jr., and I spent all day yesterday sanding everything that needed to be prepared for paint. Once smooth everything will be primed then painted with a Hatteras Off-White flattened to a semi-gloss finish.
 have been built. There is a starboard shelf that you can barely see in the cabinet on the right. I was going to say the starboard shelf in the starboard cabinet but it did not read well. You see, the starboard side of the boat is the right side (when looking forward) and starboard is a brand of plastic used on boats. I could have capitalized the S in starboard (plastic) but that could have been misleading and surely it wouldn't have gotten the point across that there were two different usages of the same word in the same sentence. I was unsure how I was going to fill the space to the left of this picture........crisis avoided.
 Head and shower area primed and painted. Digital photography with flash makes telling that this color is anything but white difficult. And the reflection of the flash is making it look like the paint is super shiny when it isn't. The color will look better once the teak (in the back of the truck) has been installed.
 For those of you that don't know, teak is really expensive. In fact the teak in the bed of this truck is worth more than the truck.
 Organization is the key to success. Now that the systems are being punched out, getting my hands on the right manual in a timely fashion is very important. We've been collecting instruction manuals for a while and the old filing system (piles of paper) had ceased working. This will also make thing easier for the owner once the boat is in the water.